Verlauf
Expressions in After Effects Basics
 erstellt von: sabinadallu
|

 Alle Kapitel anzeigen
 voriges Kapitel
With the pickwhip you can connect the wiggle expression to the slider from the slider control effect. By creating new keyframes in the null object and modifying the slider value for each created keyframe you can control the amplitude of the wiggling better.
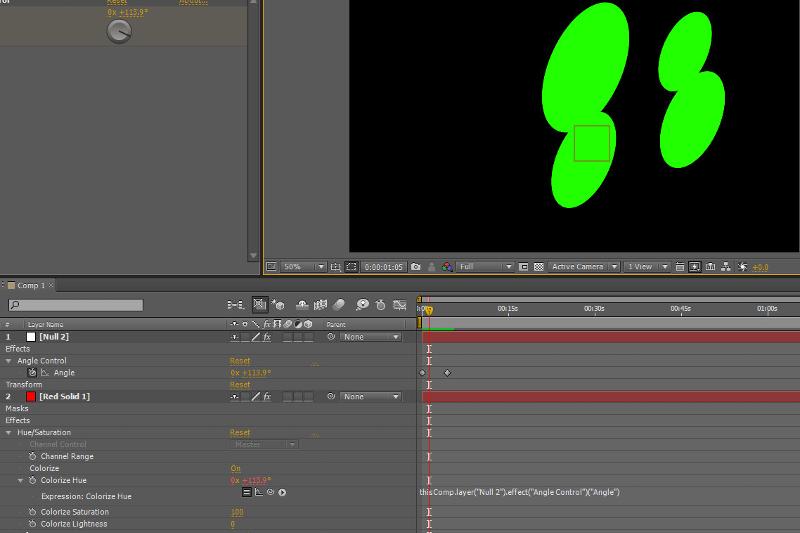
I have already added wiggle(5,6) to the expression boxes of all the layers, which is making the oval shapes wiggle with an amplitude of 5 on the x axis and 6 on the yaxis. The next step is to select the pickwhip from the rotation property of one of our layers, and drag it to the angle property of the angle control effect.
As you can see, the parameters of the expression changed into what means: the value from this property comes from another property called Angle, which is the propertyof another effect called Angle Control, from the layer Null 2.
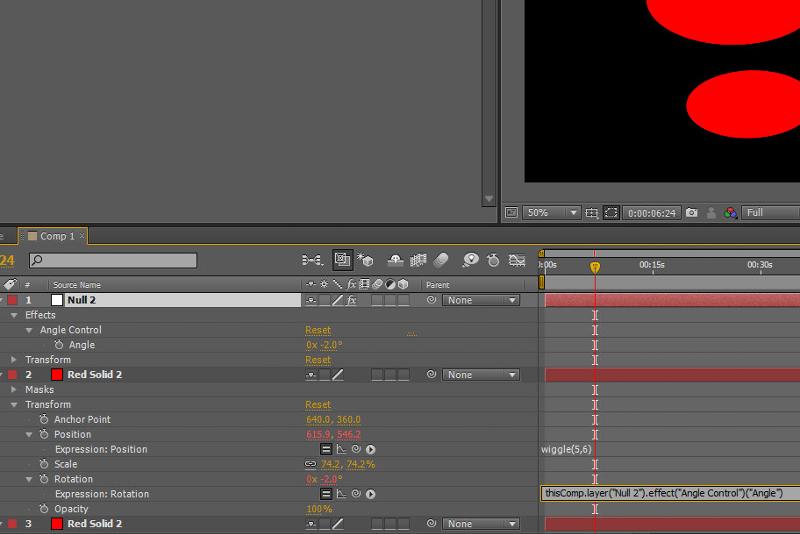
Now, when I rotate the Angle Control dial, I can see that one of my layers is also rotating. To make all the other layers rotate aswell, just copy the Rotation property into all the other layers.
Now I‘ll just click on the stopwatch of the angle dial, and rotate all the layers at once.
I also want my layers to change color as they rotate, so Iwill add a Hue/Saturation effect from the Color Correction effects to one of my red ovals. I will also click the Colorize option and set the Colorize saturation to 100, then Alt+click on the Colorize hue stopwatch, which will add an expression in the timeline.
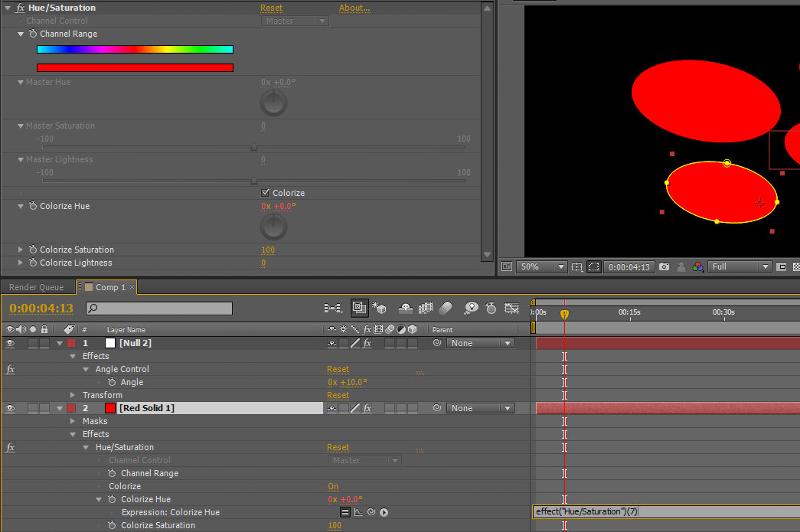
Then I will use the pickwhip from the Colorize hue expression and drag it to the Angle property in the Null object. As I move the cursor through the timeline, I can see that the layer is changing color as it rotates. All I have to do now is copy and paste the Hue Saturation effect to all of the other layers.